Technology
How to Choose a High-Definition Stereo Microscope Suitable for Engraving and Setting?

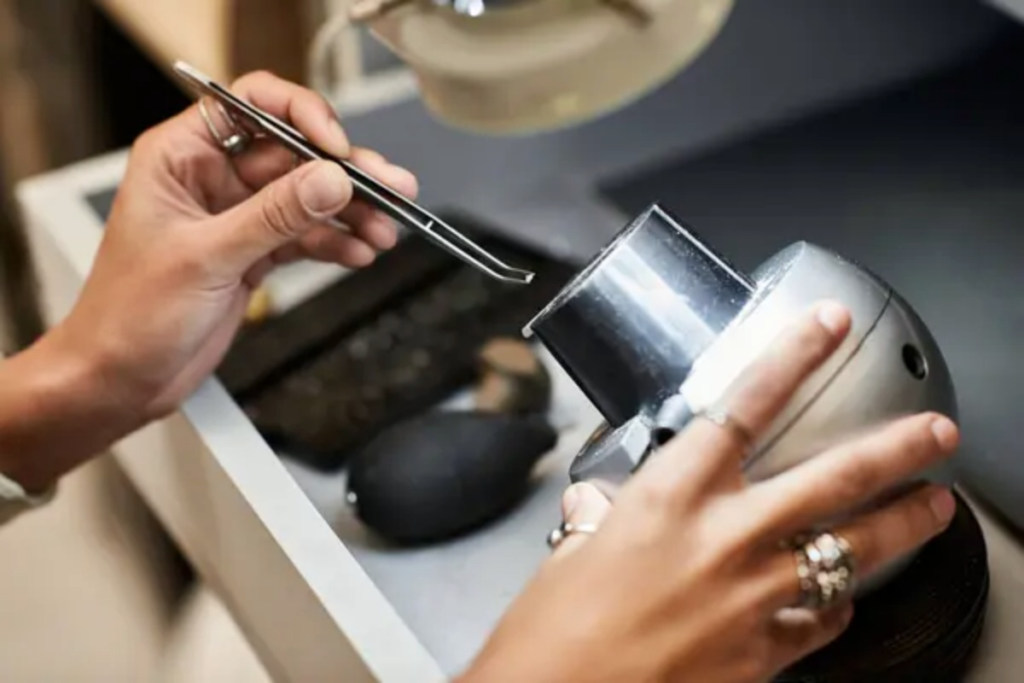
To be honest, before I started doing fine engraving or jewelry setting, I always thought that microscopes were tools used only in laboratories and had nothing to do with manual crafts.
But then one day, while engraving a tiny metal nameplate, I couldn’t see the depth of the cut with the naked eye, and my first stroke went completely off-course. It was in that moment that it suddenly dawned on me:
It wasn’t that my skills were lacking; it was simply that I couldn’t “see clearly.”
It was only after that experience that I truly began using a stereo microscope, and I gradually came to understand one thing: choosing the right microscope isn’t just “icing on the cake” for engraving—it’s a “foundational tool.”
In this post, drawing on my practical experience, I’ll share some concrete advice on
how to choose a high-definition stereo microscope suitable for engraving and gem setting.
Why is a stereo microscope essential for engraving and inlay work?
Many beginners ask:
“Is it really necessary? Can’t I just engrave with the naked eye?”
To be honest, it’s not impossible, but you’ll run into some very practical problems:
For example, judging depth. The biggest challenge in engraving isn’t working too slowly, but failing to control the depth—if you go too deep in one spot and too shallow in another, the entire design is ruined. A stereo microscope provides a true 3D view, allowing you to clearly see the changing distance between the tool tip and the material’s surface—rather than leaving you to guess.
Then there’s the issue of detail: the direction of grain patterns, the transitions at edges, and those tiny cracks in the material—all of which are easy to miss with the naked eye. By the time you finish carving and notice them, it’s too late to make corrections.
Another critical issue is the cost of mistakes. This is especially true for materials like precious metals or jade and gemstones. If you make a single wrong cut—whether it’s off-angle or too deep—it’s essentially irreversible, resulting in the waste of these valuable materials.
In fact, many seasoned professionals in this field often say something along these lines: A microscope doesn’t just help you see things bigger; it helps you avoid making those avoidable mistakes.
First, let’s clarify: What is a stereo microscope?
Simply put, the biggest difference between it and a standard microscope is:
It features binocular viewing and stereoscopic imaging. In other words, what you see through the eyepieces isn’t a flat image, but one that conveys depth and dimension.
This is crucial for tasks like engraving and inlay work that require “hand-eye coordination.”
As for common specifications, they generally include:
- l Magnification: 10x–80x, which is the standard range for engraving
- l Working distance: 80mm–200mm, a key parameter
- l Light source: Ring light / LED fill light, non-glare
5 common mistakes people make when choosing a microscope
I’ve made at least two of them myself.
Mistake 1: Blindly chasing high magnification
I used to think: “The higher the magnification, the better the precision.”
Nope.
Here’s what actually happens:
- The field of view gets super narrow
- You lose track of where you’re even cutting
- Tiny hand movements get magnified like crazy, making everything feel shaky
It doesn’t get easier—it gets harder.
In real use:
- 10x–20x → rough work
- 20x–40x → most engraving tasks
- 40x–60x → fine details
Anything higher?
Honestly, I almost never use it.
Mistake 2: Ignoring working distance
The first time I ran into this problem, it drove me nuts.
I bought a microscope that looked great on paper. Then when I actually tried to work under it—my hands couldn’t fit comfortably.
Working distance = the space between the lens and your workpiece.
If it’s too short:
- Your tool keeps hitting the lens
- Your posture gets all twisted
- You’re constantly bumping into things
A few hours of that, and your neck and shoulders will hate you.
From experience:
Around 120–150mm feels way better
Mistake 3: Bad lighting (hugely underestimated)
I used to not think lighting was that important.
Boy, was I wrong.
Bad lighting gives you:
- Glare
- Shadows that move with your hands
- Fuzzy, unclear edges
So you end up tilting your head constantly just to see properly.
A decent adjustable LED ring light makes a huge difference.
If you can get diffused or polarized light, your eyes will thank you even more.
Mistake 4: Trusting the spec sheet too much
Some microscopes look amazing on paper:
- High magnification
- “HD optics”
- All kinds of impressive numbers
But when you actually use them:
- The edges look soft
- Colors are slightly off
- Eye fatigue hits really fast
You won’t notice it in five minutes.
But after two hours of working? You’ll feel it.
And that’s what matters most.
Mistake 5: Underestimating how important stability is
This kind of problem sneaks up on you—usually when it’s too late.
If the stand is even a little unstable:
- The image wobbles
- Your hands instinctively try to compensate
- Precision goes right out the window
I used a lightweight stand once. It drove me absolutely crazy.
A heavier base + a smooth focusing system = a much more comfortable experience.
A More “Practical” Approach to Choosing a Microscope
To help others avoid the pitfalls I’ve encountered, here’s a more practical way to choose.
If you’re just starting out and looking to practice, a 20x–40x magnification model with a basic LED light and a standard stand will suffice—as long as it works, that’s good enough.
But if you’re a semi-professional or using it in a studio, a model with 10x to 60x continuous zoom, a working distance of around 120 mm, and a high-brightness ring light would be more suitable. The key is comfort and stability.
For professional engraving or jewelry setting, you’ll need a high-definition optical system, a large working area, and an upgradeable light source. The focus here is on precision and long-term comfort.
There’s another thing I only realized after using it for a while: cleaning and maintenance. Once dust settles on the microscope, oil gets on it, or the lenses get scratched, the image quality suffers significantly. For example, I’d adjust the settings perfectly, but the image would still look hazy—only later did I realize the lens was dirty.
My advice is to wipe it down with a lint-free cloth—never use paper towels—and to inspect the optical components regularly.
Simply put, the cleaner your microscope is, the higher your engraving precision will be.
Why are more and more people turning to stereo microscopes?
In the past, many master craftsmen relied entirely on their sense of touch to get the job done. But in recent years, a clear trend has emerged: precision requirements are becoming increasingly stringent, materials are growing more valuable, and details are getting more and more complex.
A microscope isn’t a tool for showing off your skills; it’s designed to help you stabilize the quality of your finished products, minimize avoidable mistakes, and learn much faster. This is especially true for beginners—once you start using a microscope, your progress will accelerate significantly.
Final Thoughts

If I had to simplify everything into one sentence: A good stereo microscope should let you see clearly, work comfortably, and stay stable over time.

Duaction: Meaning, Benefits & Learning Method Guide

DGH A Explained: Meaning, Uses & Benefits Guide

Gessolini: Meaning, Art Uses & Modern Design Guide

Who Is Dallas Yocum? Inside the Life of Mike Lindell’s Ex-Wife

Fraboc Framework: How It Improves Decisions in Life

Pabington: Meaning, Origin, Uses and Online Trend

Judy Schelin: Full Story, Case, Background & Facts

Woeken: Meaning, Origin and Digital Culture Impact

Innøve: Meaning, Innovation Mindset & Growth Guide

Harouxinn: Meaning, Identity, Branding & Digital Use

Fabswimger: Legit Platform or Something Else?

Jeroen Dik: JD Engineering & Racing Legacy

Mietmakler: Fees, Laws & Expert Tips Germany

Buutman: Meaning, Origin & Internet Trend Guide

Ronenia: Meaning, Origin, Symbolism, and Creative Guide

Uvlack: Complete Guide to UV Varnish Coating

Plftiger: Powerful AI Platform Transforming Digital Security

Piragnia Fish: Truth Behind the Piranha Myth

Veb Vatsap Com Explained: Must-Know WhatsApp Web Guide